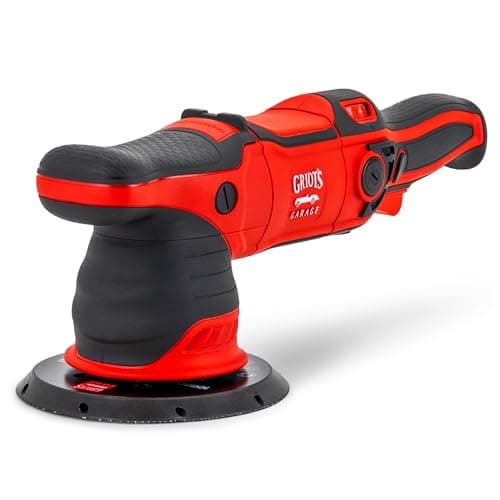
Featured here: the Griot's Garage Griot's Garage G9 Random Orbital Polisher.
How this is funded: we earn an Amazon commission when you buy through our links, at no extra cost to you. We sell nothing and stock nothing, so a pick is never a product we are trying to move. Prices are pulled live from Amazon and were last checked October 5, 2026; where we cannot verify a price we say so rather than print an old one. Full disclosure.
Research-basedPicked from published specifications and the pattern across verified-purchase reports. We have not used these ourselves and do not pretend otherwise.How we pick
A dual action polisher is forgiving by design: press too hard and the pad stops rotating rather than digging in. That mechanical safety net is why this is a job a careful amateur can do well. What follows is the sequence, the settings, and the places where people still cause damage.
02
Before you plug anything in
Polishing dirty paint drags grit under the pad, which is the fastest way to add scratches while trying to remove them. The car must be washed, decontaminated and completely dry first.
A 9mm throw and a 1000W motor put the G9 exactly where most home detailers should be: fast enough to finish a car in an afternoon, short enough in the throw to stay predictable near badges and body lines. It is the machine we would buy if we were buying one machine.
Who should skip it. If you already own a competent 8mm machine, this is not the upgrade you think it is — the extra millimeter of throw will not fix inconsistent results. Put the money into better pads and a second liquid instead. It is also heavier than the G8, and you notice that on vertical panels after an hour.
Correction speed
8.5
Control
9.0
Ergonomics
7.5
Build
9.0
Value
8.5
What works
9mm throw is the best general-purpose compromise on the market
1000W does not bog down under pressure on a cutting pad
Griot's lifetime warranty is the strongest in the category
Takes the same 5 in plate and 5.5 in pads as everything else
What does not
Heavier than the G8, which shows on doors and quarters
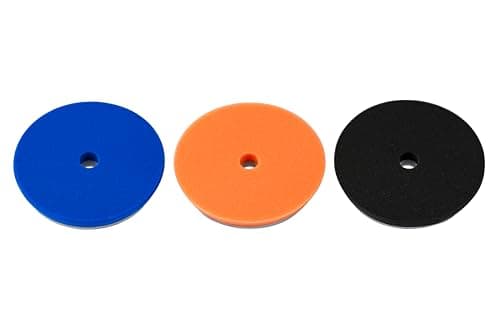
Lake Country makes the foam a great many other brands rebadge, and the HDO line is built specifically for the pressure a long-throw machine puts through a pad. A three-pack of the same pad is more useful than four different ones, because a saturated pad stops cutting and you need a spare mid-panel.
Who should skip it. Short-throw machines under heavy pressure — HDO foam is designed around orbital machines and is firmer than a general-purpose finishing pad. If you only ever finish, buy a softer foam.
Cut
8.0
Finish
8.0
Longevity
8.5
Value
8.5
What works
Multiple identical pads, which is how pads should be bought
Built for the pressure a long-throw machine applies
Lake Country foam is the reference other brands rebadge
What does not
Firmer than a general-purpose finishing foam
5.5 in is too large for tight panels — you will want smaller too
No cutting and finishing variety in a single-type pack
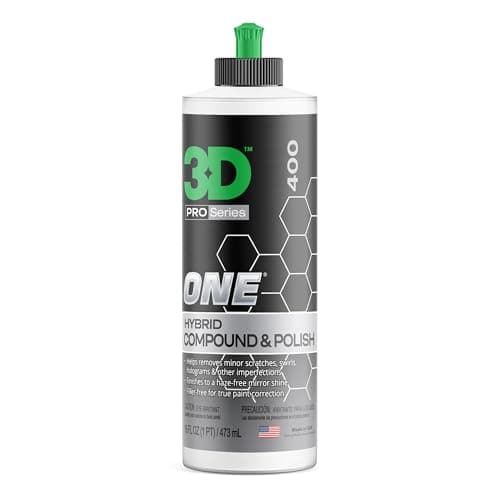
3D ONE is a genuine one-step: it starts as a compound and the abrasives break down as you work, so the same pass that removes the defect also finishes it. On a medium pad it handles most daily-driver swirls and leaves paint that does not need a second liquid.
Who should skip it. Anyone who wants maximum cut. A dedicated heavy compound removes more, faster. ONE is a time-saver and a simplifier, not a defect-removal champion.
Cut
8.0
Finish
9.0
Ease of use
8.5
Value
8.0
What works
Truly finishes down, so most cars need only this one liquid
Very low dusting compared with traditional compounds
Flexible — cut level changes with the pad you pair it with
What does not
Less outright cut than a dedicated heavy compound
Costs noticeably more per ounce than Ultimate Compound
Needs working properly; rushing the pass wastes the diminishing abrasive
01Place the pad flat on the paint before switching on. Starting the machine in mid-air slings compound across the car.
02Spread the product over the section at speed one or two with the machine moving steadily.
03Turn up to speed four or five and work in overlapping passes — left to right across the section, then top to bottom over the same area.
04Move about one inch per second. Slower than feels natural. This is the single most common technique error.
05Use enough pressure to keep the pad flat and no more. If the pad stops spinning, you are pressing too hard.
06Work until the compound goes clear, typically four to six passes, then switch off while the pad is still on the paint.
07Wipe the residue with a clean microfiber towel, turning to a fresh side as it loads up.
08Inspect under a light before moving on. If it is not right, another pass now is easier than coming back.
06
The five places people cause damage
Where damage actually happens
Where
What goes wrong
How to avoid it
Panel edges
Clear coat is thinnest there and burns first
Tape them, and keep the pad on the flat
Raised body lines
The pad concentrates on a narrow ridge
Tape, and approach along the line rather than across it
Around badges
The pad catches and the edge lifts
Tape, or remove the badge if you can
Plastic bumpers
Thinner clear coat and plastic holds heat
Lower speed, lighter pressure, shorter passes
The last panel
Fatigue, and a saturated pad
Swap to a fresh pad, take a break
07
Cleaning the pad as you go
A pad full of spent compound stops cutting, and that happens faster than people expect — roughly every panel on a dirty car. Blast it with compressed air while it spins, or press a clean microfiber brush against it at low speed. Swap to a fresh pad entirely when air no longer restores it.
After the job, wash pads in warm water with a mild detergent, rinse until clear, squeeze rather than wring, and air dry face up. A pad with compound dried into it is finished. More on care in the polishing pad roundup.
08
What to do immediately afterwards
Freshly corrected paint is bare. There is no wax, no sealant and no coating on it, and it will start collecting contamination the moment you move the car. Protect it the same day — a sealant, a wax, or a ceramic coating if you corrected with coating in mind.
09
Questions people actually ask
What speed should a dual action polisher be on?
Speed one to two to spread the product, four to five to work it. Six is for heavy correction on flat panels and generates the most heat, so avoid it near edges. Work until the compound goes clear, then stop.
How long does it take to polish a whole car?
A careful single-stage correction on a mid-size car is most of a day for someone doing it for the first time, including washing and decontamination. Experienced detailers do the polishing itself in three to five hours; the prep is what takes the time either way.
How do I know when to stop polishing a section?
When the compound goes clear. A diminishing abrasive has finished breaking down at that point, and further passes only generate heat without removing more. Wipe and inspect under a light rather than guessing.
Why is my pad not spinning?
You are pressing too hard, or the pad is loaded with spent compound, or the surface is too curved for the pad to sit flat. Ease off the pressure first — that is the cause nine times out of ten, and it is the machine's stall protection working as designed.
10
Sources
Every published figure on this page traces to one of these. Where a manufacturer does not publish a number, the page says so rather than estimating it.
Last reviewed October 5, 2026. Think a figure here is wrong? Tell us at contact@detailingandwax.com and we will check it, fix it and date the correction — see our editorial policy.